Documentation Index
Fetch the complete documentation index at: https://docs.inferable.ai/llms.txt
Use this file to discover all available pages before exploring further.
This guide will help you quickly set up and run your first Inferable agent workflow.
We will build a simple workflow that greets the user, as an illustration of the basic concepts.
Get you API key
You can get a free API key by signing up at app.inferable.ai. Copy your API key to your clipboard. You’ll need to paste it into the next step.
Clone the starter project
Clone the starter project and install dependencies.git clone https://github.com/inferablehq/inferable-node-starter
cd inferable-node-starter
npm install
Paste your API key
Paste your API key into the src/workflows/simple.ts file’s client initialization.const inferable = new Inferable({
apiSecret: "sk_inf...",
});
Create a workflow
Let’s extend the simple.ts workflow with an example that gets some structured data from a website.Workflows are a way to define a sequence of actions to be executed. Workflows are durable, can be triggered from anywhere via the API.They run on the machine that they are registered on - i.e., your own compute.// src/workflows/simple.ts
// ... starter code ...
workflow.version(1).define(async (ctx, input) => {
// Add this code to the workflow
// 1. Fetch the URL
const text = await fetch(input.url)
.then(res => res.text());
// 2. Parse the text with a structured output
const { menuItems, hours } = await ctx.llm.structured({
input: text,
schema: z.object({
menuItems: z.array(z.object({
name: z.string(),
price: z.number(),
})),
hours: z.object({
saturday: z.string(),
sunday: z.string(),
})
}),
});
// 3. Return the structured data
return { menuItems, hours };
});
// This will register the workflow with the Inferable control-plane at api.inferable.ai
workflow.listen().then(() => {
console.log("Workflow listening");
});
Start the workflow
Start the workflow by running the following command.npx tsx src/workflows/simple.ts
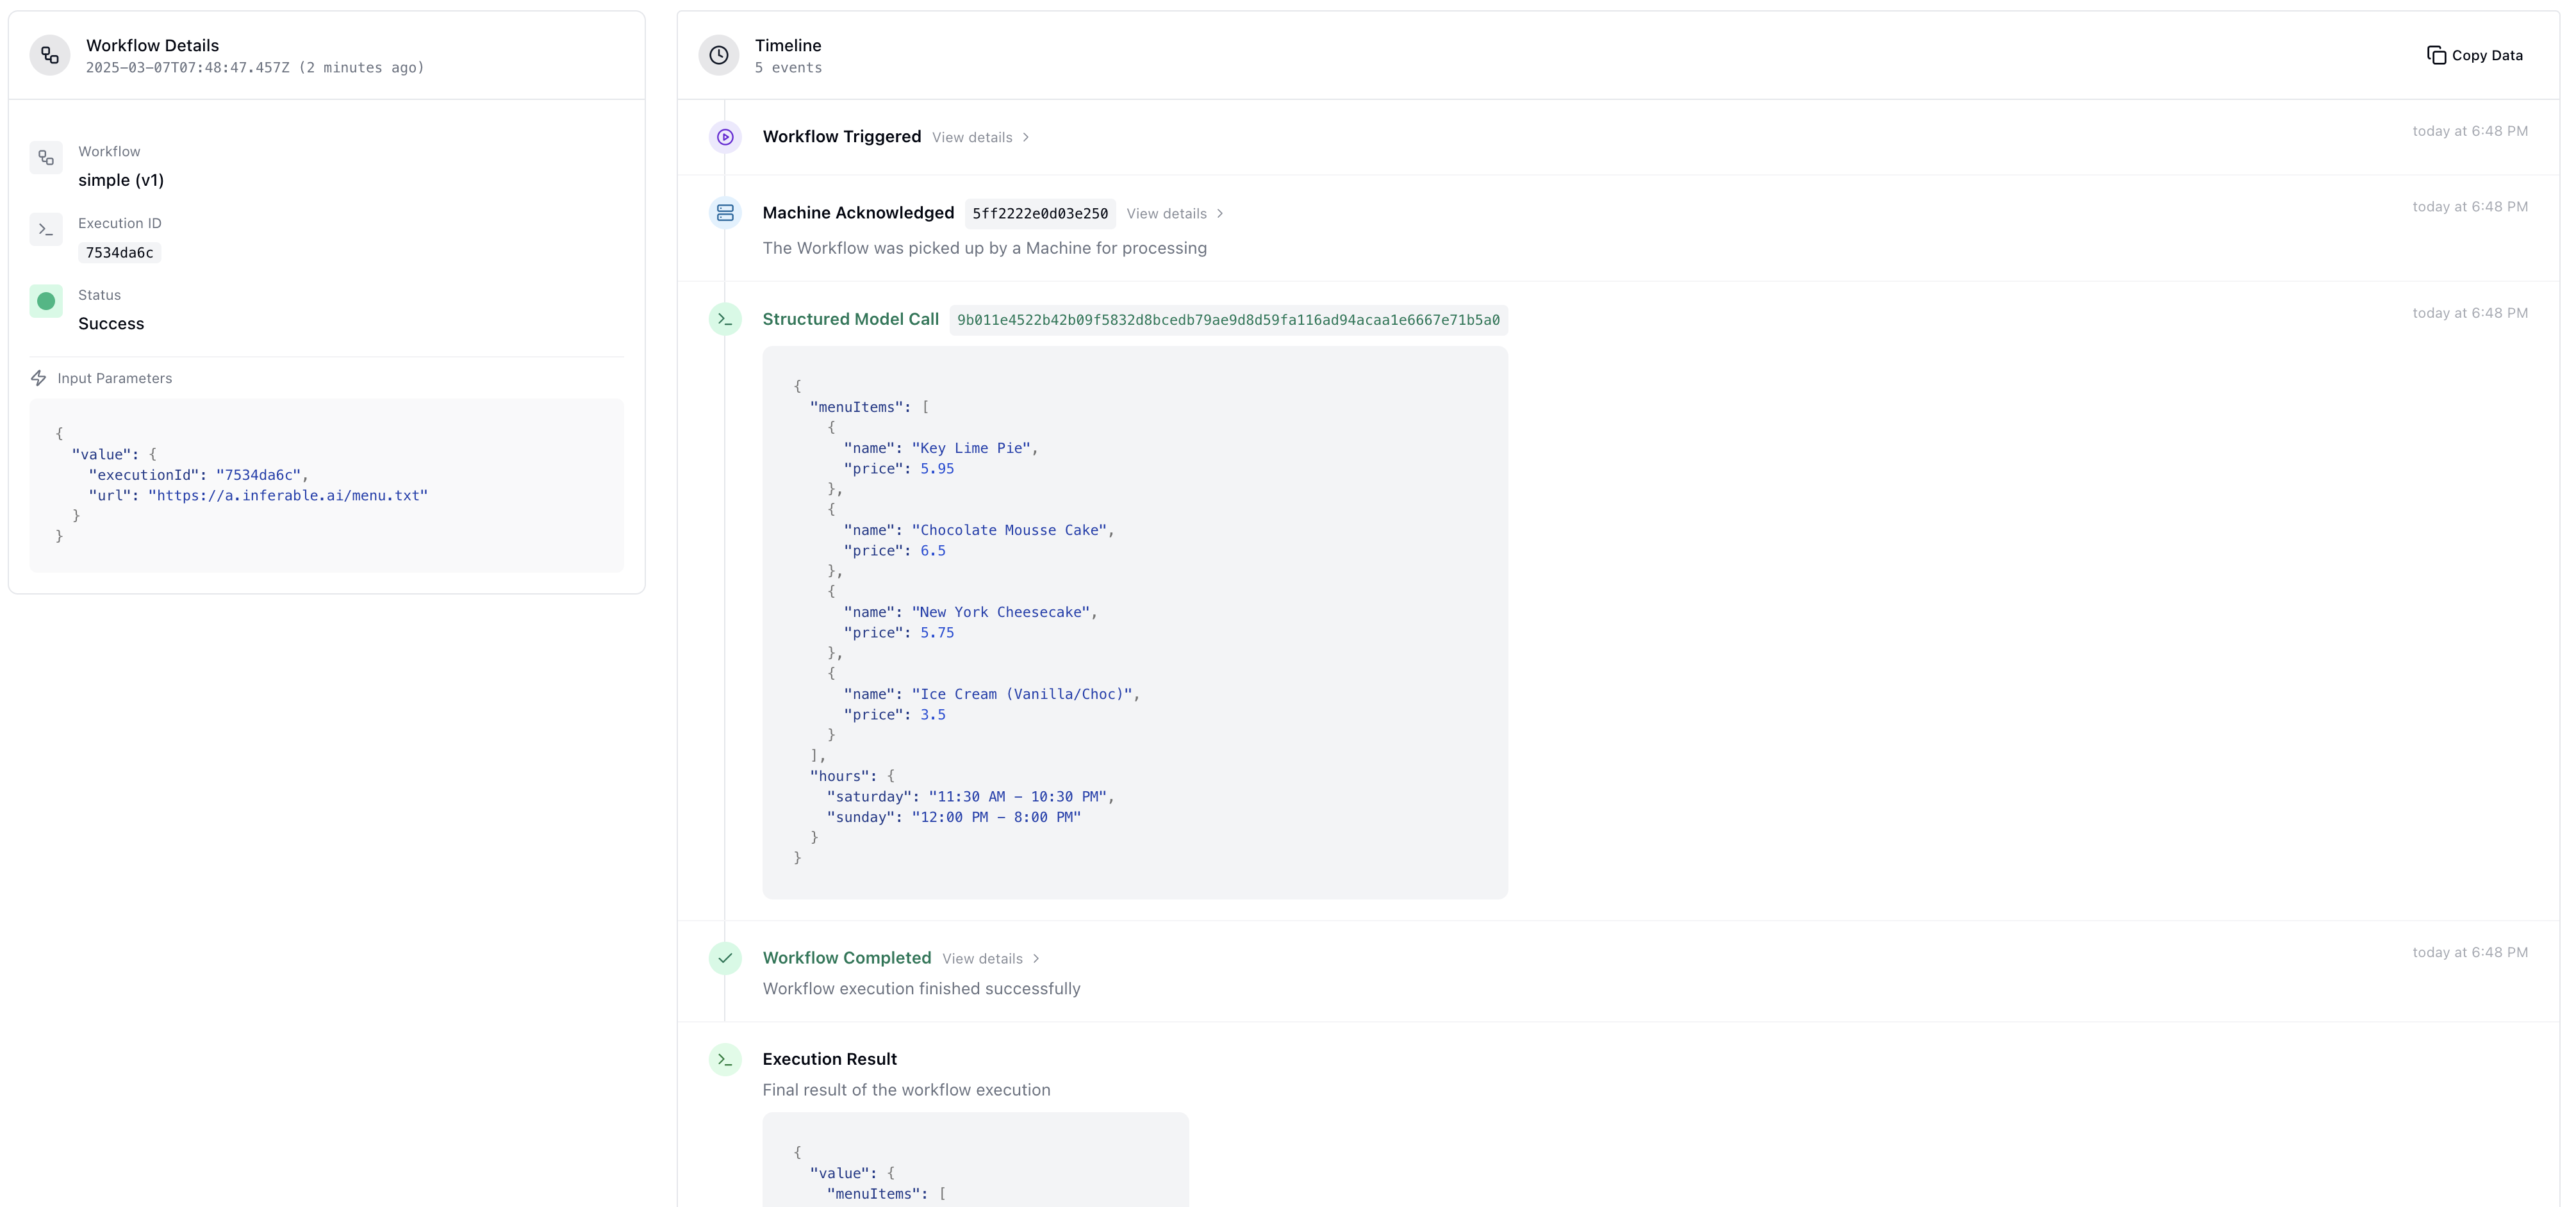
Trigger the workflow
Workflows can be triggered from anywhere.For this example, we’ll trigger the workflow with a curl command.# Get your cluster details
CLUSTER_ID="PASTE_YOUR_CLUSTER_ID_HERE"
API_SECRET="PASTE_YOUR_API_SECRET_HERE"
RANDOM_ID=$(openssl rand -hex 4)
# Run the workflow
curl -XPOST https://api.inferable.ai/clusters/$CLUSTER_ID/workflows/simple/executions \
-d '{"executionId": "'$RANDOM_ID'", "url": "https://a.inferable.ai/menu.txt"}' \
-H "Content-Type: application/json" \
-H "Authorization: Bearer $API_SECRET"
# See the output at https://app.inferable.ai/clusters/$CLUSTER_ID/workflows/simple/executions/$RANDOM_ID
echo "\n\nSee the output at https://app.inferable.ai/clusters/$CLUSTER_ID/workflows/simple/executions/$RANDOM_ID"